
This guide aims at helping you pick your best float line, giving you some insight about the best sellers on the market, and answering some questions that may come to your mind when considering getting a float line for your speargun, or freediving activities. You’ll also find a set of float line installation instructions. And after you’re all set, we’ll be glad to send you off with some pro tips before you go on your quest.
So, if you are already interested in spearfishing, we’ll be glad to show you around some of the best float lines out there in the market. And if you aren’t, you can still take a look, maybe you’ll change your mind.
So, let’s take a look at what we have here.
2. Riffe heavy-duty Vinyl Float Line Assembly for Spearfishing and Freediving
Main Features
Riffe heavy-duty Vinyl Float Line comes in black, blue, or orange colors. It’s offered in several lengths starting from 25ft to 100ft.
This float line is highly compatible with bungee float lines: you can combine your Riffe float line with a bungee one so easily.
It’s equipped with a 400lb tuna cord, and 680 lb test nylon core, 2 stainless steel shackles, quick clips, and swivels. It’s also highly convenient for those who are in for the float line flexibility to use with big catches.
3. Maverick America Big Game Float Line
Main Features
Maverick America Big Game Float Line comes in a blue jacket. It’s offered in 60 ft length, ideal for inshore hunting, and 100 ft length, ideal for bluewater hunting. It has stainless steel tuna clips, and a tuna cord with 725 lb spectra stuffing.
4. Storm Vinyl Float Line for Spearfishing – 35 foot/10.7 Meters
Main Features
Storm Vinyl Float Line for Spearfishing comes in an orange jacket and offered in 35 ft length.
It has stainless steel clip assemblies so you won’t have to worry about water wearing your clips away. You won’t have to worry about them coming off your cord either, the line itself is made of heavy-duty vinyl with heat-sealed ends.
5. Spearfishing World Tubing Float Line
Main Features
Spearfishing World Tubing Float Line is offered in navy blue color, 50 ft length, with the ability to stretch up to 60 ft (20% of its original length).
It has a fine quality outer vinyl tubing for high flexibility and UV resistance, and spectra inner cord that can hold up to 1000 lb. Moreover, the entire hardware is stainless steel. And the best part, it comes with a velcro band for ease of rolling after use.
Now that you’ve had an idea about some of the best products out there, it’s time to choose the right float line.
Choosing the Right Float Line
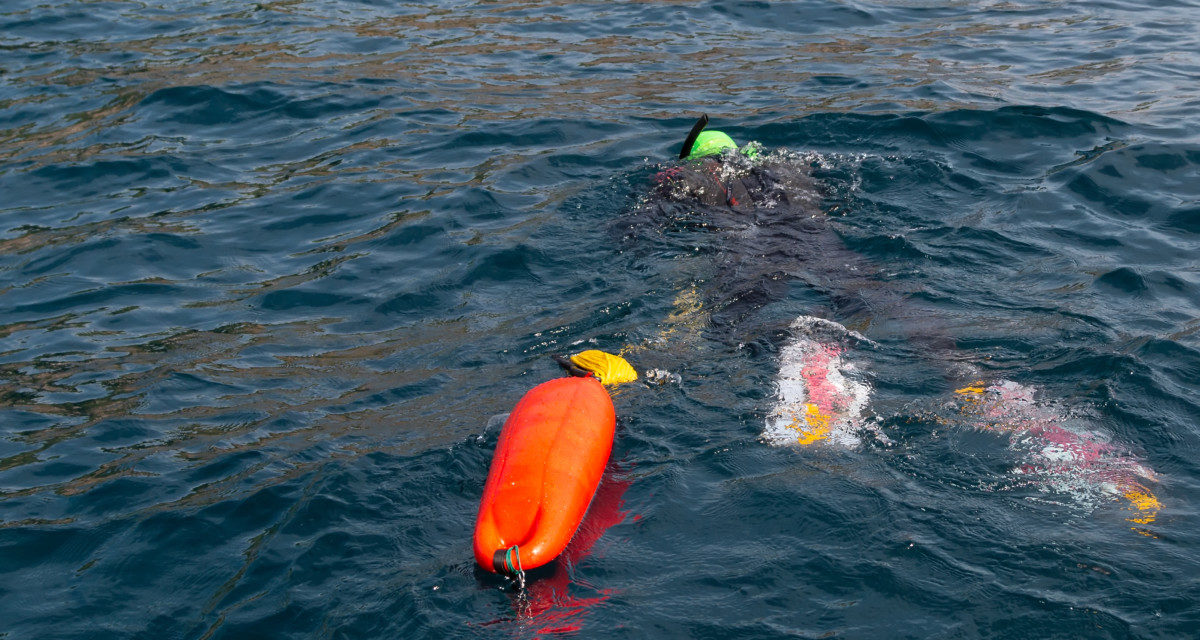
Before you go spearfishing, you’ll certainly need a float line to which you’ll attach your float to mark up your catch location, and make it obvious to other boats out there that you’re fishing.
Having a float line installed also helps you retrieve your catch easily, just by putting your speargun aside and pulling the float line up to your boat.
What color should I choose for my float line?
Float lines come in various colors, black and dull green are always the best choice to help you lay low from your potential catch.
Red and orange are good, too. Their high visibility to other boats on the surface tempts some spearfishermen to use them. However, they aren’t highly recommended when it comes to using in deep water: the deeper you dive in, the greyer they get.
What material should I choose for my float line?
Float lines also come in various materials, the two most popular of which are ski rope style float lines, and Dyneema PVC coated float lines.
A Ski rope style float line is ideal for:
- Spearfishermen on a tight budget, or in for fishing for smaller species.
- Use in rocky areas, where it has a lot of corals, or oyster shells: its high durability and UV resistance mitigates the risks of puncturing and UV rotting.
- Easy splice and enabling you to get a strong grip on it.
However, here are some points which you may not like about a ski rope style float line:
- You can get it tangled up or caught on rocks. But don’t worry, you won’t pull it up with a hole in it, .
- It does not have much buoyancy to help it come back up to the surface as quickly as you would like. This contributes to tangling it up as you pull it back.
As an upgrade to ski rope float lines, Foam-filled ski rope float lines have been introduced, featuring everything we love about regular ski rope float lines, in addition to enhanced buoyancy. So, less pull up time, and less possibility of getting tangled on the way up back.
As for Dyneema PVC coated float lines, on the one hand, they are ideal for:
- Underwater hunting, especially in Australia
- Spearfishermen in for longer lines: Dyneema PVC coated float lines are stiffer and with less chance of tangling.
On the other hand, you may reconsider using a Dyneema PVC coated float line because:
- PVC coating is prone to puncturing and corrosion, which yields a great possibility of filling up with water and losing buoyancy, sinking in the worst case, once there is a hole in the line.
- You need to think for which type of fish you plan to use such lines; sharp-toothed fish can easily bite the PVC through.
An upgrade to the Dyneema PVC coated float line is Riffe PVC float line; it has pretty much everything Dyneema PVC float line has, in addition to two heavy-duty shark clips, one on each end. It’s been also designed for more extension between the speargun and a larger float, making it ideal for large open sea species fishing.
You may like such line if you:
- Would like to use it for large pelagics (+60 lb); it has a bungee cord of very high quality.
- Prefer less pressure on your rig; it’s designed to stretch for as long as possible, also preventing big catches from tearing it off.
- Like hunting in open sea and blue water.
But, you should consider the following before making up your mind on using Riffe PVC coated float line:
- Its ideal use is limited to Bluefin Tuna, Yellowfin Tuna, and Billfish. Where it isn’t as of use for Dog Tooth Tuna for instance; the fish may be able to reach for the reef.
And once this happens, there is more chance you can get broken off, or losing your catch to the sharks.
Setting up your float line
After you’ve chosen the best fit for a float line of your use, it’s time to set your gear up.
Now we’ve got:
- A speargun
- A float line
- A bungee cord (optional)
- A float
We need to attach all of these together, in a manner that ensures your gear won’t break off, and your fish won’t get away.
- First of all, to save yourself the hassle of getting all tangled up and lost in the rope, wrap the float line around the float, but make sure both of its ends are free. Don’t worry about unraveling it before getting it into the water, it will unravel itself.
- Now you have a float line with a swivel, and float with a front. Attach your swivel to the float front.
- The other free end of the float line, a.k.a the tuna cord gets attached to your gun through the shark clip.
- Watch this video to avoid rookie mistakes when attaching the float line to your gun, and to get a better near-hands-on experience setting your gear up.
Some Spearfishing Pro tips
Now that you’re good to go, you may use some pro tips.
1. Don’t go alone.
Make sure you have a buddy by your side. Dive buddies are important to help through shallow water blackouts you may encounter. No matter how experienced you are, never dive alone.
2. Know your dive spots before you go.
If you’re a starter, you’ll most likely go to a gear store first. You can ask the staff there about dive areas for starters and which areas to keep off.
However, if you decide to go out on your own without prior research, explore the spot yourself before you take the spear out.
Either way, avoid areas with strong currents, and those more than 20ft deep.
3. Never, EVER, go into, put your hand, or spear in dark spots.
If you do, you’re a sitting duck for eel bites, every diver’s worst nightmare. For your first reflex will be to pull your hand out, which will only make it worse: eel teeth will shred your arm before you even know it with their inward curves.
However, most eel bites are non-venomous. But you don’t need to take such chances, just avoid the whole thing.
4. Get yourself a mentor.
Find someone in your same diving area with great experience and enough tolerance to answer as many questions as you’re going to ask.
5. Don’t start big.
Take baby steps, starting from your gear to your diving spot. Take it step by step to the next level to build up your confidence and expertise level.
6. The cliché “Aim small, miss small” works like a charm!
Meaning that you should minimize your aiming area to minimize the miss chance.
Whereas if your goal is just to spear the fish anywhere the spear hits, the spear will hit anywhere, which is more likely to be any area but the fish body itself.
So, aim as small as you can. This also increases your chances of killing the fish with one shot. This happens only when your spear has hit the fish in the right spot, just above the gill.
7. Leveling up comes with better breath-hold.
An experienced diver’s breath-hold is standard of 3 minutes. It helps him pick the perfect spot to watch the potential catch closely before firing his spear.
Of course, you will need time to develop such a skill, but you’ll make it eventually.
Best Float Line Brands:
1- Mako
Mako gear is mostly the best quality for the lowest price, i.e.: the greatest value-for-money.
Moreover, Mako products are also pretty convenient for entry-level spearfishermen, whether it’s their spearguns or other gear (float lines, floats, fins, … etc). Mako also offers one of the top best customer services around the world.
2- Riffe
Also convenient for entry-level, and provides a much wider variety of spearguns in particular; different lengths and different mechanisms among about 5 different series.
We know you have a lot of questions to ask about spearfishing in general, and float lines in particular. Don’t you worry; we’ve got you covered with a couple of FAQs.
Q: Should I use a float while I’m spearfishing?
A: Yes, you definitely should. For the following reasons:
- As a spearfisherman, you may often need to let go of your gun after you’ve speared a fish for some air up on the surface. A float marks up your gun location to make it easier for you to come back to it.
The float is fighting the speared fish for you while you catch your breath.
After you’ve got all the fresh air you need, you can swim over to your float, pull your float line, and hence your speargun and fish, up to the surface.
- Your own safety: floats usually have bright colors such as red, yellow, or orange. Hence, pointing out your location more obviously to other boats around, reducing the risk of potential collisions or similar types of accidents.
Fact: most spearfishermen injuries and deaths are due to collisions; where boats run over diving fishermen accidentally as their whereabouts are usually not that clear for running boats.
- You can also hold on to your float to get some rest on the surface.
Q: How do I take proper care of my spearfishing gear?
A: – For your speargun: Wash each piece of it with fresh water thoroughly. You should even get your trigger washed with a hose stuck into it. And store your gun in a cool, dark place inside a speargun bag.
- For your float: wash it thoroughly with fresh water, and keep it in a cool, dark place away from the sunlight.
Q: Why do I need a float line to my speargun?
A: If you’re new to spearfishing, a speargun with a reel can put you in an unnecessary mess of too much nylon strings everywhere underwater, and getting tangled up in the weed.
Q: How do I choose the right float?
A: Inflatable floats are pretty popular with spearfishermen; they’re tough, light, and durable. They weigh almost nothing, perfect for traveling, and can be deflated to a very small size. However, some people may go for hard floats as a safer option than inflatable ones as they aren’t likely to get popped or get holes in them, although they take up much space and can be very heavy.
Q: So you mean inflatable floats are prone to holes and popping easily?
A: No, they’re usually made of durable material that tolerates spearfishing in rocky areas. An inflatable float is nothing like just a balloon: it’s a double layer gear. The outer layer is a thick, tough one, and the inner is the inflatable tube which is inflated and deflated. So, it isn’t too likely to “accidentally” pop your float if you choose to go with the inflatable type.
Q: Is it true that the bigger the fish I’m going after, the more floats I’m going to need?
A: It’s true to an extent: when fishing for large species like Tuna, it may pull your inflatable float down into the water, which the float might not stand. So, you may need to enforce your inflatable float with a hard one for more stability and clearer markup. You need that hard float to make sure that no matter how deep or far your speared fish and equipment go along with it, they will eventually come back up to the surface, thanks to your hard float.
To wrap it up.
When it comes to spearfishing, it’s highly recommended to use a float line with a float instead of a reel. You have to choose among different varieties of float lines according to your needs: inshore or blue water hunting, the type of fish you’re going after, the water temperature, and your level of expertise.
Avoid rookie mistakes when installing your gear, from wrong installation order to misplaced shackles attached to your cord.
Make sure you take proper measures for your safety before you go spearfishing according to your level of expertise, and bear in mind that improving your skills is not an overnight hit, it’s an ongoing process that takes a lot of time, perseverance, and practice.
